You’ve probably seen dozens if not hundreds of YouTube videos with those pesky yellow arrows and eye-catching text on their thumbnails. YouTubers use them for a reason. The yellow color is rather attention-grabbing, and it doesn’t raise any cognitive alerts like the color red. The arrow itself guides the eye to where the creator wants you to look.
What if we told you that you can use the same tactics throughout the entire video? Yes, the process may be a little bit more time-consuming than adding an arrow to a picture, but the result is oh-so-much better.
Adding a couple of action overlays, text animations, eye-candy effects or stickers can crank your viewer’s experience up to eleven. More on the matter, these tricks are useful to everybody willing to make a crisp video and not just to the select few who make a living out of creating content for YouTube.
If you’d like to add a couple of cute/badass overlays to your videos, you’ll need specialized software – a moviemaker. Feel free to use Animotica if you are not willing to pay an arm and a leg. The app is free and it is also one of the best-reviewed video editors on Microsoft Store.
Contents
What is a video overlay?
If you have a TV that supports the picture in picture mode you already know what a video overlay is. In case you don’t – it is essentially another video, clip, image, green screen text animation, etc. on top of another video.
The only difference between video overlay and its elder brother from television sets is that the earlier is much more hip and can do all sorts of neat tricks.
This is how you can create a simple video ad for your campaign using Animotica overlays and animation.
How to create a video with animated overlays
Let’s take a look in details.
If you’ll chose to go with Animotica, downloading and installing the app shouldn’t take you longer than 10 minutes. Alternatively, you can go for a similar solution but we can’t guarantee it will work as described below. Feel free to add animated effects, text, stickers, and eye-candy stage transitions to your clips in a handful of clicks.
Step 1: Groundwork
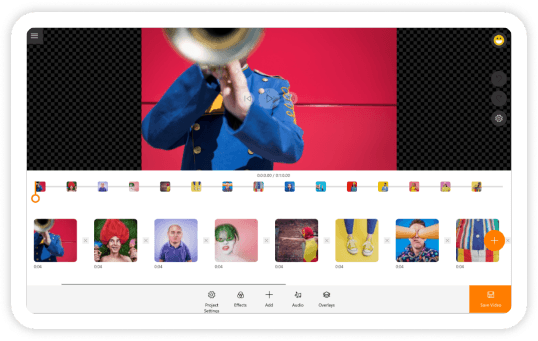
Once you have downloaded and installed the application, all that’s left is to run it. Launch Animotica and create a project.

Upload a clip you’d like to edit. Feel free to upload several clips if you’d like to either cut and paste them together or add one on top of the other.

Step 2: Add the overlay to you video
Once you are all set and done, open the overlay tab. It is located under the video preview section of the UI.
How to add text, video, image or GIF overlays to a video?

If you’d like the video to have a title or any other message you prefer to convey through text (such as a speech bubble, etc.), you can. Click ‘Overlays’ and the “Add Text” button.
Type in your words and boom – you know how to add text to a video!
More on the matter, once you are done typing, feel free to personalize your message with additional fonts, font brushes, and text colors.
PS: If you’d like to add text stickers, the same principle applies.
To add stickers to a video, select ‘Stickers’ and pick one of the stickers from Animotica stickers Library.

Follow the same logic adding video or images to your clip.
In Animotica you can also add GIF file to your video directly from GIPHY or from your computer. Follow the same logic as with previous described overlays or take a look at this article for more details.
How to animate an overlay?
Now that we’ve covered the entirety of the basics, it’s time to add a little bit of impact to your masterpiece. An animated overlay, after all, will have a much more polished look and feel.
Don’t worry, the process of animating an element of a video is much less intimidating than it sounds.
Select the overlay you want to animate (you can easily get there from the main page of your project. Click on ‘Overlays’ -> select the one you want to animate).

Click on the motion tab while the overlay option is still selected, and pick the animation effect to your liking.

Pro tip: Experiment with the duration of your animations to make them run like Sonic or flow into the frame in epic slow-mo. And don’t forget to set the duration for your intro/outro animations to give the video a polished touch.
Step 3: Polish
Now that you’ve added your video, text, or stickers, it’s time to make sure they pop on the screen at the correct time. Click on the time in the left corner of your screen and you’ll see a slider you can use to adjust the time frame of your effect.

How to animate overlays in Animotica example
On the video example, you can see in details how to add text and image overlays to your video and even apply Chroma Key effect to it.
If you want to learn more about it, check up our blog on how to use the Chroma Key (Green Screen) effect.
That’s it, you now have an animated overlay to enhance the delivery of your vision through engaging video content!


