Let’s say you shot different videos covering different scenes and activities that you want to share in one video. Or perhaps, you want to make a compilation of your favorite movie scenes for your YouTube channel. In any case, you need to know how to merge video files in Windows 10/11 (or any OS for that matter).
Fortunately, this is very easy to do. We will show you how to combine video clips using Windows Movie Maker, and you’ll also find a better way to achieve this using a more efficient video editor.
Let’s dive into it.
Contents
How to Put Videos Together Using Windows Movie Maker
It is no longer news that Windows Movie Maker (WMM) has long been replaced by Microsoft Photos, even though most people still refer to Windows inbuilt video editor as WMM.
Microsoft Photos is not as intuitive as its predecessor, but it can still be used to complete simple projects, such as video merging. Let’s show you how right away!
Step 1: Launch Microsoft Photos
Simply search for “Photos” using the quick search bar. Launch the app and select video editor. Next, hit New Video Project. Follow the prompt to input a name for your project and you’ll be good to go.

Step 2: Upload your Video Files
Hit on Add to begin uploading all the videos you want to join together to your project library. Next, drag these clips into the storyboard, as shown below.

You can arrange these clips in any order you want or even add more clips if you want to.
Step 3: Save your Video
Now that you’ve had your clips in the storyboard, saving the project will effectively merge them into one video. Hit Finish Video. On the next window, hit Export, and that will be all.

As you can see, it’s pretty easy to merge MP4 files using Microsoft Photos. But what if there was an easier way to merge videos and even create richer and more engaging videos?
Well, there is: Let’s talk about Animotica, the #1 alternative to Windows Movie Maker according to thousands of Microsoft Store users.
How to Merge Video Files using Animotica
Animotica is an easy-to-use video editor that makes video editing fun and uncomplicated for everyone. It allows you to run all kinds of video projects, from marketing videos to vlogging content.
That said, merging videos is a cakewalk in Animotica. Let’s show you how it’s done!
Step 1. Download and launch Animotica.
If you don’t have Animotica yet, click this button to download it from Microsoft Store for free.
Step 2. Create a new project.
Launch Animotica and click on New Project.

Step 3. Upload your video files to merge them.
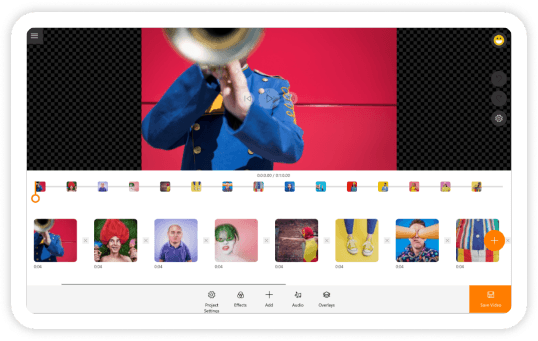
Select Add Video/Photo Clips to begin. Next, navigate to where you have your videos stored, hold down the CTRL button, and select all the videos to upload at once.
Alternatively, you can upload them one after the other by selecting the Add button and following the prompt.

You can also add more clips by clicking on the + (plus) button right next to the last clip on the screen.

Once uploaded, you can drag around the files to arrange them as you want! You can also make copies of uploaded clips if needed or easily delete them.
Pro tip: Add a cool transition effect between the clips to make your videos look so much crisper!
Learn how to add seamless transition like a pro!
Step 4. Export
With all these video files in your project window, you can now merge them by hitting Save Video.

On the export window, you can leave the parameters the way they are and hit Save As. Next, input your desired filename and hit Save.
That’s all! Animotica will export these clips as one video file. Mission complete!
Conclusion
It’s pretty easy to merge video files in Windows 10/11. Even a basic video editor can handle it. We hope you enjoyed doing this in Animotica using our guide. Feel free to experiment with all the cool tools you see in the editor and let us know if you have any recommendations and queries.
Cheers!


