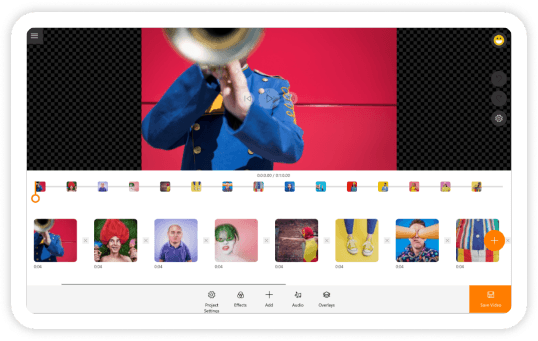
With over 4 million awesome users and counting, Animotica continues on its stride towards making a powerful video editor that is not just easy to use but fun as well.
In light of this, Animotica now has a verified brand channel on GIPHY, a popular platform for finding and sharing stickers and GIFs.
Having an account on GIPHY means that Animotica has the opportunity to provide custom-made stickers and GIFs, which you can use for your video projects on Animotica. You can also use the custom stickers and GIFs on social media platforms and literally any app that supports GIPHY.
Contents
Check out New Animotica GIPHYs
Where can I use Animotica stickers & GIFs?
Everywhere. You can find Animotica gifs & stickers on every platform that supports GIPHY, including Instagram Stories and Direct, Facebook, iMessage, and, of course, Animotica Video Editor.
Here’s a quick guide on adding Animotica Sticker to your Instagram Stories.
Adding stickers and GIFs to your videos makes them appear more fun and engaging to your viewers, and Animotica wants you to maximize that as much as you can.
So, how do you use GIPHY on Animotica?
It’s easy! But we’ll show you how it’s done right away.
How to Add Stickers and GIFs to a Video in Windows 10/11 Video Editor
Let’s dive straight into it!
Step 1: Install and Launch Animotica
If you don’t already have Animotica, hit the button below to download it for free from Microsoft Store.
Once you’ve installed it, launch the app and hit on New Project. Once you’ve done that, you’ll be taken to a blank project window where you’ll be locked and loaded for action!

Step 2: Upload Your Video
Tap on ADD VIDEO/PHOTO CLIPS to reveal the file upload tray. Here, from your options, you can see that there is a GIPHY option available as well. You could just click on it and quickly upload a GIPHY. However, this tutorial is showing you how to add a GIPHY sticker or GIF to your video. So, you should hit the Add Video or Photo Clip button from the tray.

Now, navigate to your storage location and select all the files you need for the video (images, footages, or both!)
Step 3: Add your GIPHY!
To do this, we’ll use the overlay tool. Let’s start by hitting on Overlays.

On the new window, select Add Overlay. A tray of options will come up, and you should see GIPHY on the fourth row.

Now, you’ll be taken to the in-app GIPHY page, where you’ll see a bunch of GIFs and stickers connected to two radio buttons of corresponding names. For this example, we’ll be using GIFs.
You can tap on the sticker button to switch to stickers if you want.
So, let’s search for Animotica. Here, you’ll see some of the custom GIFs and stickers we already have. We will add a lot more with time!

Look through the options to find the GIF or sticker that works best for you, click on it, and it will be added to your video.

Step 4: Adjust the GIPHY
You can move the GIF around, rotate, and even adjust the size to suit your taste. To move it around, just hold the mouse on the GIF and drag it to your preferred location.
To change the size, click on the ring on the side of the GIF. To rotate, click on the ring on the edge of the GIF.

Feel free to add more GIFs or stickers to your video but don’t make it crowded, so it won’t end up looking ugly!
Other advanced settings you can manipulate to give your GIFs and stickers a unique touch include motion, effects, color adjustment, Chroma Key, and more.
Just tap on the GIF or sticker to reveal the editing options and then experiment with anything you find interesting. You can always undo any errors you make, so there’s really nothing to lose!
Step 5: Save your Video
Once you’re done adding the GIPHY elements, it’s time to save your video. Just hit on Save, this will take you to the export window.

You do not have to adjust any settings here as Animotica automatically chooses the best parameters to ensure you export your videos faster without ruining the quality.

Click on Save As to add a name to your video. Afterward, click Save.
That’s all! You can now sit back and let Animotica handle the rest!
Conclusion
With Animotica, we’re constantly finding ways to make video editing fun for all our users. We hope that this short guide was helpful to you. Feel free to share any suggestions or questions you might have and we will be here to respond ASAP.
Cheers!
You might also like:
How to add GIF to Your Video or another GIF in 3 Clicks!


