Whether you’re trying to make a history video or trying to throw in some flashback scenes in your video, the old TV effect is one of the fun ways you can get bring that immersive retro vibe into your content!
In this guide, we will show you how you can use these effects in an entire video project, in specific clips, and even to specific video frames in less than 5 minutes!
Let’s get into it.
Contents
Add the Old TV Effect Using Animotica
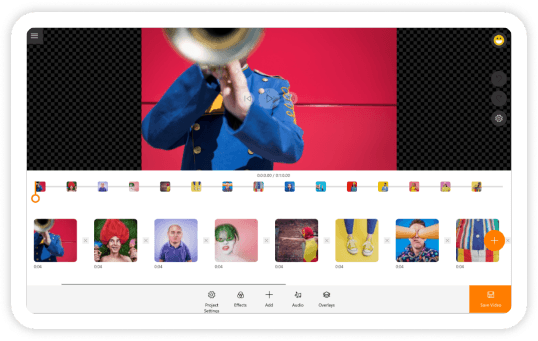
Animotica is a feature-rich, easy-to-use video editor available for all Windows 10 users. The software provides 80 unique special effects, including the Old TV series, to help you transform your videos.
Hit the button below to install it for free.
What Other Effects does Animotica Have?
Apart from the Old TV effects, Animotica has an extensive collection of other effects. Let’s just list them in this section.
- Glitch Series
- Shake Effect Series
- Color Filters
- Set 100
- Black Filters
- Mirror Effects
- Collage Effects
Feel free to run through this guide to learn about these effects and how to work with them.
How to add one Old TV Effect to all the Clips in Your Project
You can add the same Old TV effect to all the clips in your project by following the steps below.
Step 1: Launch Animotica and Create a New Project
Double-tap on the app icon to launch it. Next, click on New Project.

Do you see a blank project window? Awesome! Now it’s time for the magic!
Step 2: Upload Your Video
Click on Add Video/Photo Clips to begin. From the pop-up drawer, select Add Video or Photo Clips.

Now you can go through your PC’s storage, find the video(s) you’d like to upload, select them, and hit Open.
Note: Animotica will briefly generate proxy versions of your videos. This is to help you edit even faster and further improve your experience. Learn more about proxy files here.

Step 3: Add the Effect
This is the easiest part. Simply click on Effects to begin!

Now scroll through the collection until you find the Old TV section. From here, you can choose between Old TV and VHS 100. Afterward, hit Go Back. You can also tap on compare to see how your video has changed before and after the effect.

Step 4: Save Your Video
Easy as pie! You’ve already added the Old TV effect to your video. So, let’s say you don’t want to add any extra edits to your video. The next step would be to hit the export button.

On the export window, feel free to skip ahead and click Save As. Next, input your desired filename and hit Save.
At this point, you can just chill and let Animotica take it from here.

How to Add the Old TV Effect to One Clip in your Project
If you used the Effect tool as described above, the Old TV effect would be applied to all the clips in your project.
But what if you had multiple clips and would like to add the Old TV effect to just one?
Well, that’s super simple, and we’ll show you how!
Step 1: Click on the Clip You Want to Edit
From the screenshot below, there are three clips, thus, three thumbnails. Click on the one you’d like to edit with the Old TV effect.

Step 2: Select Effect
You’ll notice that an array of features will appear. Simply move to the right and select Effect.

You can now select the Old TV effect and save your video as already discussed!
How to Add the Old TV Effect to One Frame from the Same Clip!
This is an exciting new feature from Animotica! So let’s say you shot a pretty long video and would like to add the old TV effect to one of the frames (or scenes) from this video. How would you do that?
The previous section showed you how to add the effect to a clip when you have multiple clips. Looks pretty easy, right?
Now, only a few video editors allow you to add effects to specific frames (or scenes) within a clip. But since you have Animotica, you’re rolling with the cool guys! 😀
Here’s how to add the old TV effect to one frame from the same clip.
Step 1: Find Effect Layer
Simply hit on Add as shown below. Navigate to the Overlays section and select Filter Layer. Now you’ll find the Effect Layer between the color correction and 3D LUT layers. Select Effect Layer.

Step 2: Select Your Effect
You can now scroll to the Old TV effect section and select the one you want, as already described. Once that’s done, you can hit Go Back.

Step 3: Adjust the Effect to Match the Frame You Like
When you hit Go Back, you were taken to a window similar to the one below.

All you need to do now is adjust the length and position of the red overlay bar to match the scene you’d like to apply your Old TV effect.
Afterward, you can save your video as already described in previous sections!
Conclusion
We hope this guide was easy to follow and you enjoyed it as much as we did!
The Old TV effect is very effective for telling powerful nostalgic stories. Be sure to let your creative juices run as you explore all the things you can do with this new effect!
In any case, we’re always here to help with your inquiries and complaints.
Cheers!


