
This lesson will teach you everything there is to know about how to add audio to video in Windows 10/11, mute a video, and increase/decrease the volume of a video, or make any other changes to the audio in your video in Windows 10/11.
Have you ever noticed how all the best movies, video games, and even YouTube videos have amazing soundtracks? This can’t be a coincidence, can it?
No, it most definitely cannot.
Sound is as integral an element of a mesmerizing scene as the actors, backgrounds, and visual effects. Going silent for a moment after an intense scene helps the viewer reflect on what they have seen. Leaving a tune to play out in the background ever so slightly sets up the tune without obscuring the dialogue. Tuning or muting background noises and audio clutter will ensure that the video never breaks the immersion.

Without further ado, let’s explore how to mute the video and add audio, eliminate unnecessary noises, or increase the volume on the crucial scene in your clip.
Contents
How to Add Audio to Your Video in Windows 10/11
Step #1. Pick the tool and prepare your files.
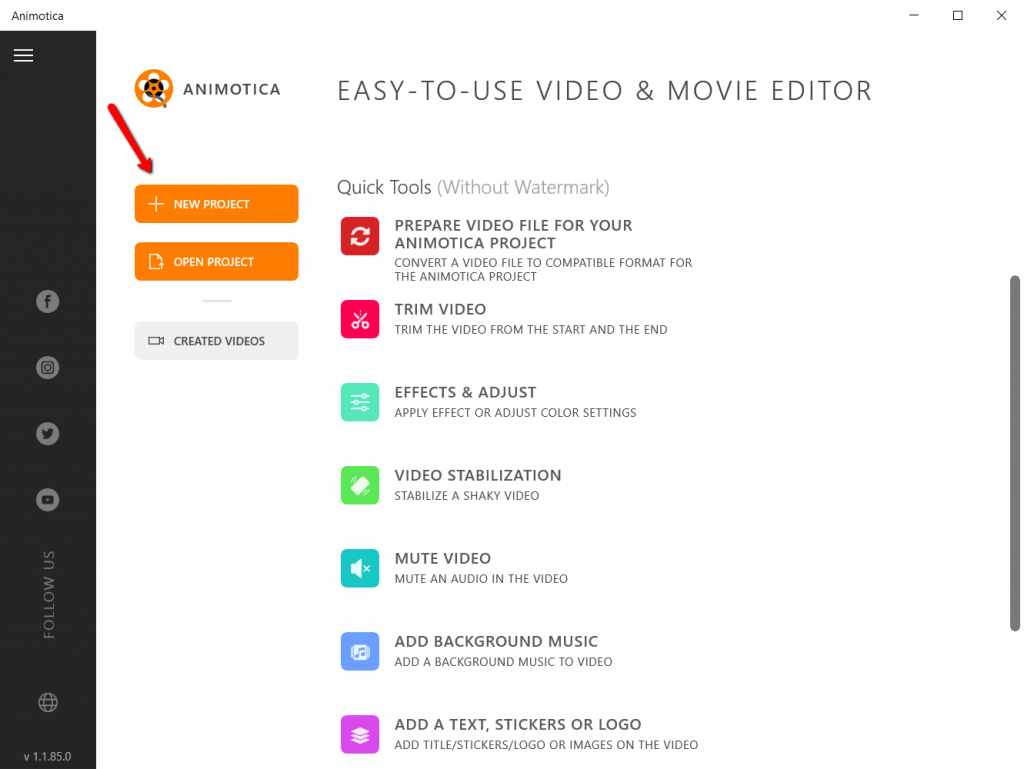
For the sake of this example, we will be using the Animotica moviemaker, which you can download from Microsoft Store for free.

It is one of the best-reviewed apps on the Microsoft store and it is 100% free (unless you mind the watermark). Downloading and installing the app shouldn’t take longer than several minutes, but, as always, you are free to experiment with other tools and applications if you feel like it.
Step #2. Open your files in the video editor.
Before we can proceed to mute an audio clip, we are to add said clip first, right?
After you set it up, mouse right click on the video file you want to add audio to and ‘Open with’ -> Animotica. Alternatively, you can open the application and upload the visuals you would like to enforce with an amazing audio track. In this case, Click ‘New Project”.
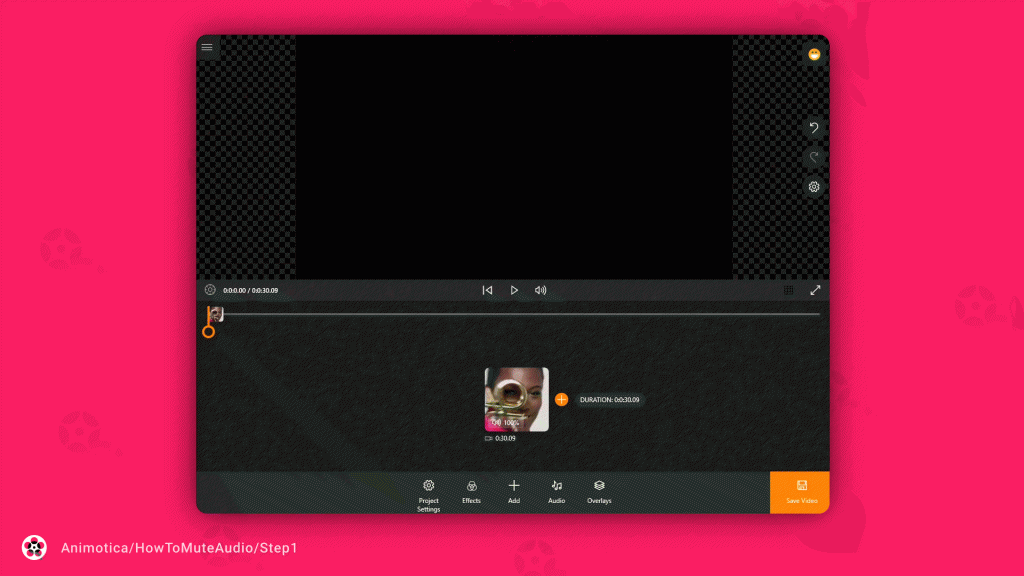
Upload your files.
Step #3. Mute Current Audio in Your Video (to Remove Audio From Your Video)
In case if your video doesn’t have any audio, you can skip this step and proceed to step #4.
Step #3.1. Click on your clip and navigate to ‘Sound’.

Step #3.2. Put the volume to ‘0’ (or change it).
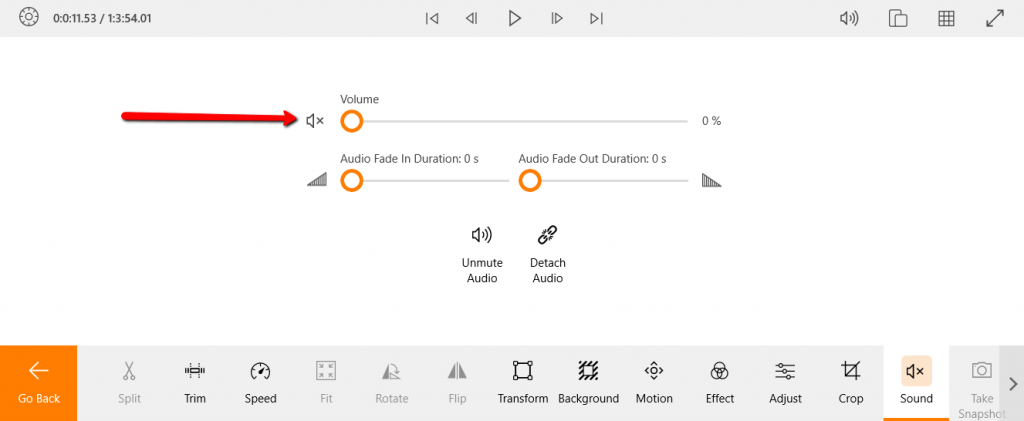
There’s obviously much more we can do with the soundtrack on this step. For starters, you have probably noticed we are using a slider.
What this means is that we don’t have to pick either 0 or 100. Feel free to experiment with the volume of your audio if you need to change it.
Now you’re ready to proceed to the next step.
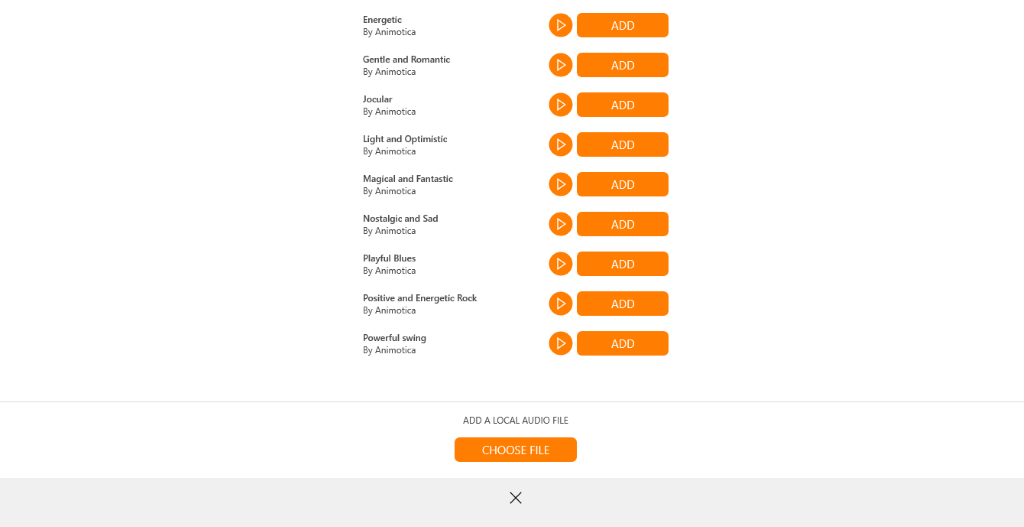
Step #4. Add an Audio File to Your Video.
Simply click on the Add Audio tab in the app’s interface and upload your audio clip. Alternatively, you can use the clips offered by the Animotica movie maker. These bad boys fall under fair use and will keep your video safe from the pesky YouTube copyright claims taking the platform by storm at the moment.
On the next step, simply select ‘Add Audio’ in the bottom menu.
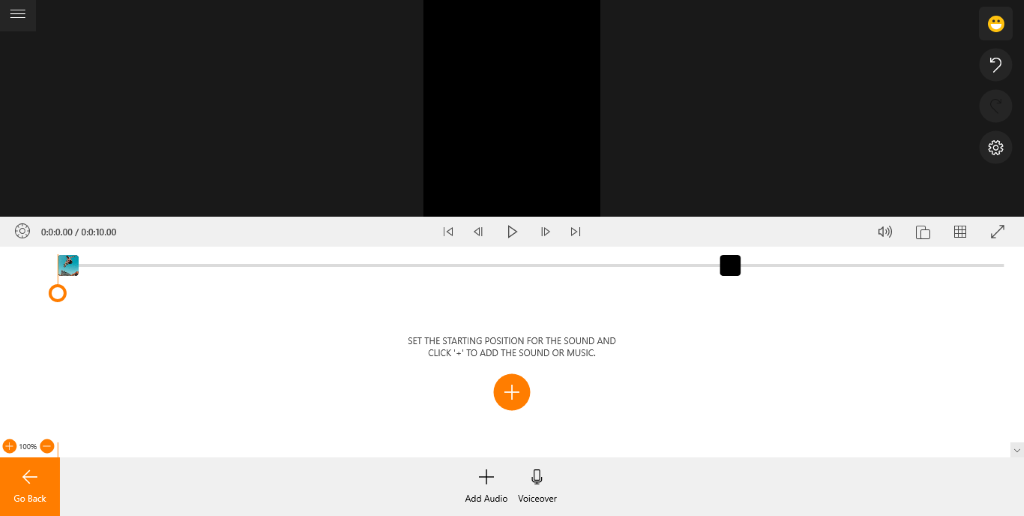
Then you can select one of the available audio files in Animotica’s library, or click the ‘Choose File’ button to upload something that you’ve prepared on your computer.
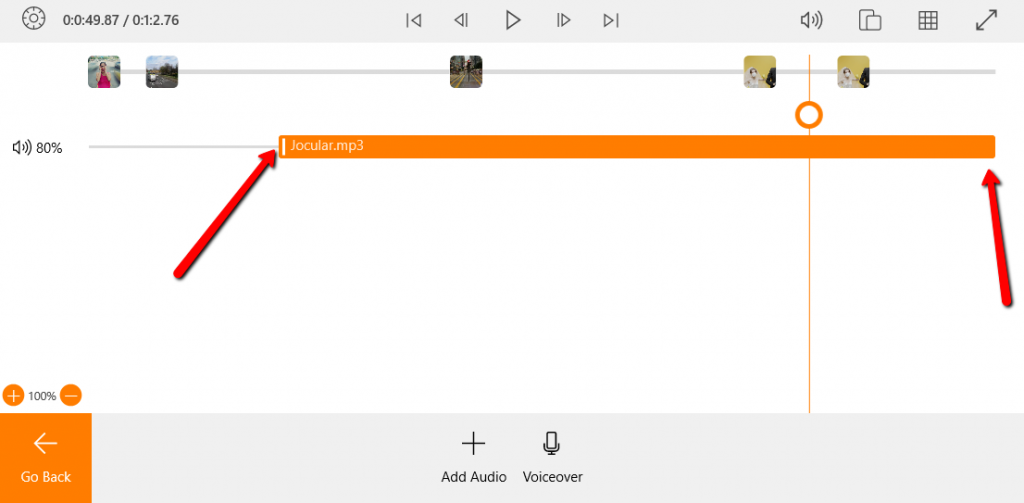
Step #5. Adjust the Audio Track on Your Video.
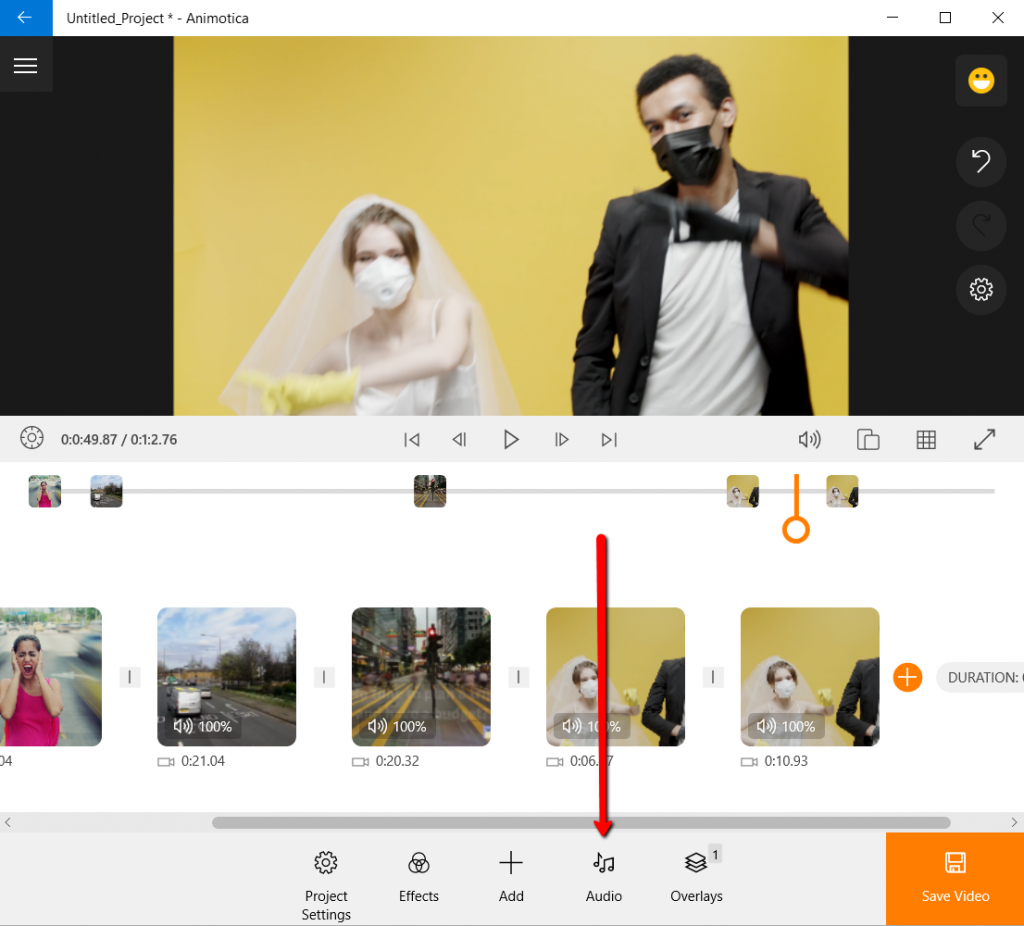
Drag-n-drop the audio file into the required position as it’s shown on the screenshot below/
How to Edit Audio in Your Video
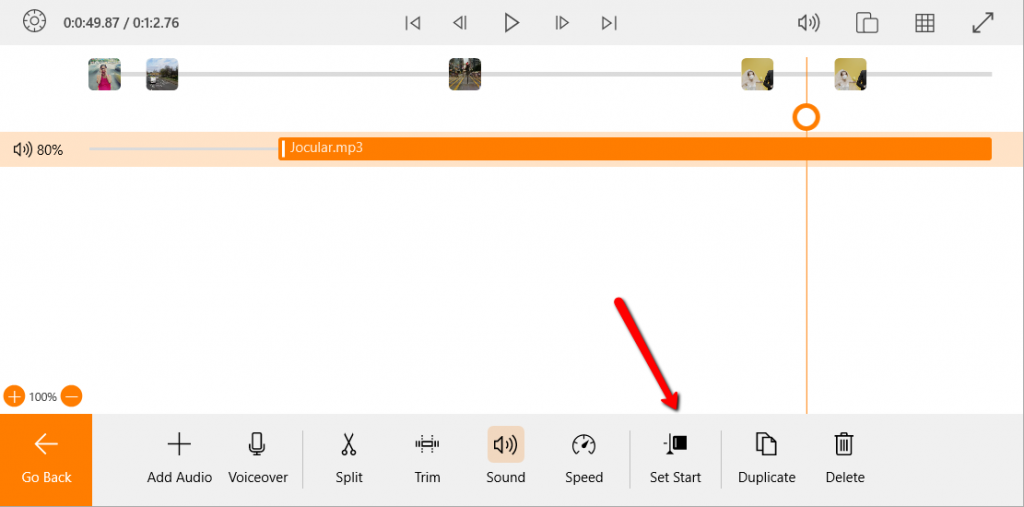
Now, when you have an audio set up, you might want to make some changes to it, to make sure it goes perfectly with your video.
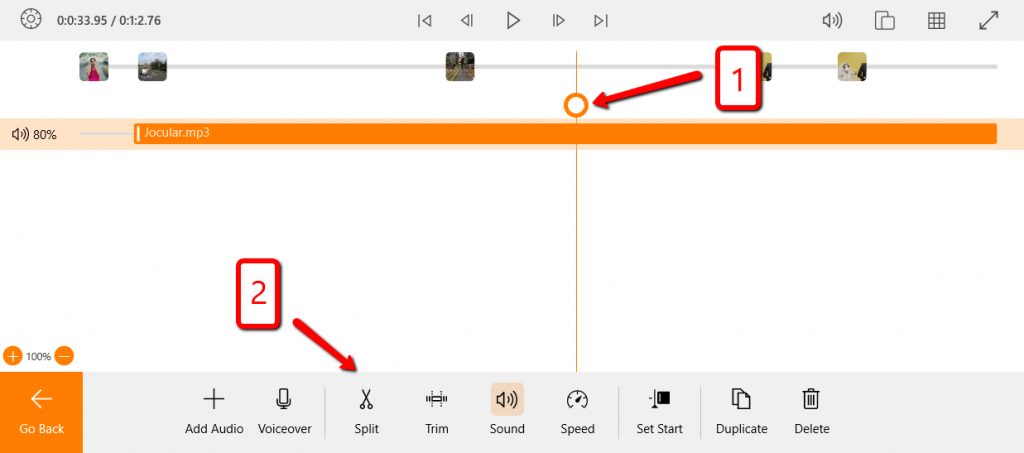
To edit audio in your video, you simply need to click on the audio track and you will see the menu at the bottom of the screen as you can see on the screenshot below. You can also find here an alternative option to set up the right moment for your audio to start playing.
How to split the music into parts in your video
In case if you want to cut your audio track into a few pieces, select a place where you want the first part of the audio to end and click ‘Split’.
It’ll probably be easier if you were to split the video into clips in advance, but either way works.
Pro tip: You’ll have to select the audio file and then choose either the Trim or the Volume option to edit it.
How to Trim Audio in Your Video
In case if you want to keep only particular parts of your audio file, you need to trim it. Click ‘Trim’ and adjust the starting and ending points of your audio track. You may also trim by audio frames or set start/endpoints in the small menu below your track.
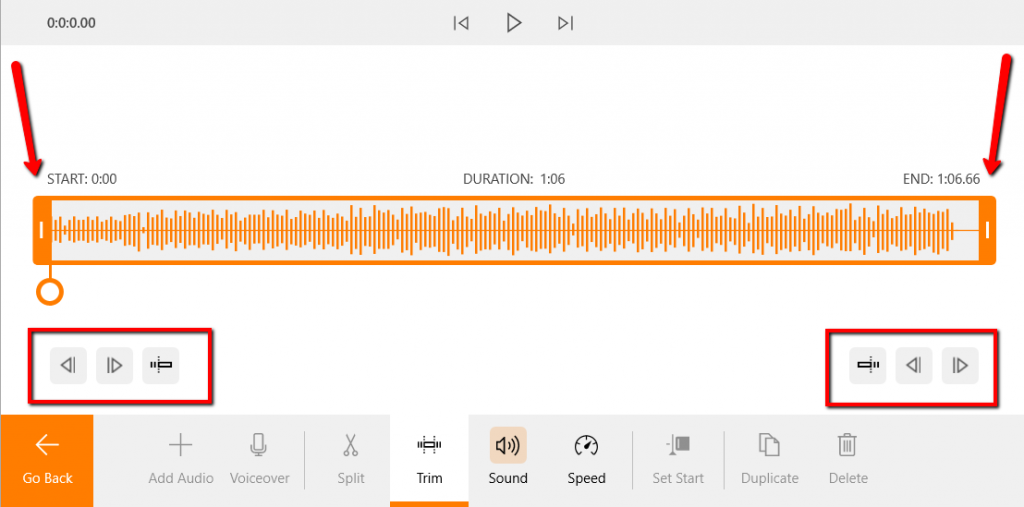
No need to do any extra actions, adjusting the beginning and ending parts of your audio file will crop it automatically.
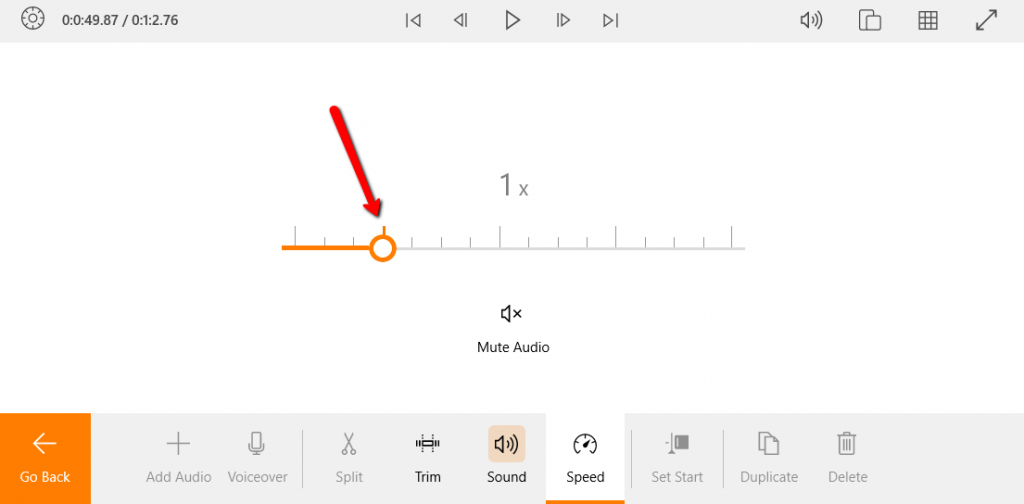
How to Change the Speed of Audio in Your Video
If you want your sound to play slower or faster, click ‘Speed’ and adjust the position. Keep in mind, that ‘1’ stands for the original speed of your audio file. Thus, making the speed less than ‘1’ slowdowns the sound, while making it more than ‘1’, speeds it up.
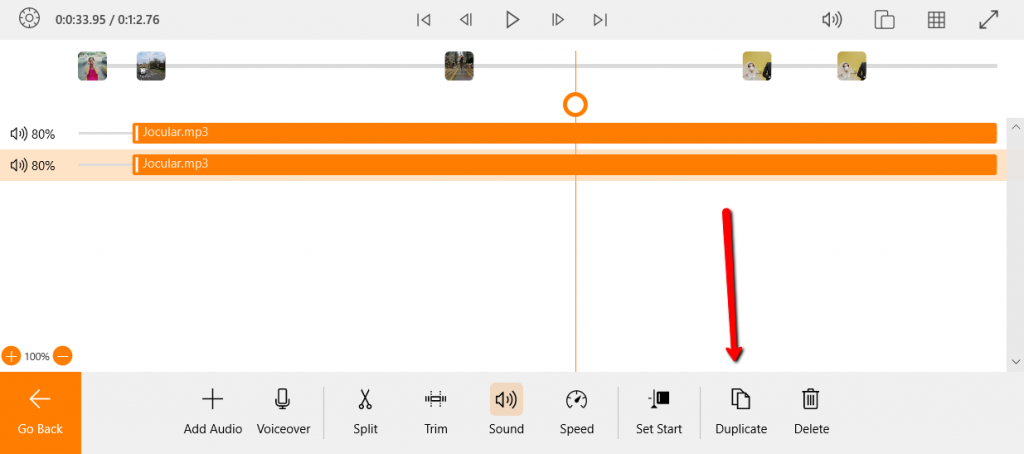
How to Duplicate Audio Track in Your Video
If you’re happy with your audio track and want to copy it, click ‘Duplicate’ and you’ll see a new, exactly the same audio track, created.
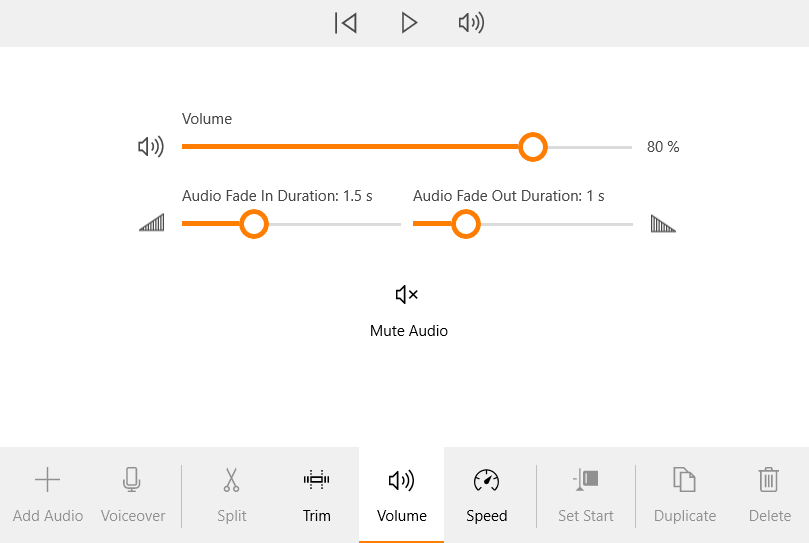
How to Add Fade-in/out an Audio in Your Video
In case if you want to make a smooth entrance or exit of the sound in your video, Fade in/out feature is what you need. Bear in mind, that you can apply fade in/out only to the audio overlay added to your video in Animotica.
To do so, simply click on the audio file you added to the video as overlay, select Volume and set up the duration of audio fade.
Confused? Here is a complete guide on how to fade sound in your video.
How do you Extend the Duration of the Audio to the Whole Length of the Video?
Probably, your video files are longer than your audio file.
There are a few options to approach this issue. The one which you’ll choose will depend on the kind of your video and audio files.
Option #1. Slow down your audio file. To do that, click on the audio layer you selected, and choose ‘Speed’. Adjust it accordingly.
Option #2. Duplicate your audio file. Use duplicate feature to do so.
Option #3. Select a few audio files.
Option #4. Decrease the duration of your video to align it with the audio duration.
Option #5. Decrease the duration of the transitions between your videos.
Ok, now that we know how to mute the sound in a video, and we are aware of the handy volume sliders, what’s the first thing that pops into your mind?
If you are anything like us, it is the thought that you desperately need a decent burger and a mug of ice-cold IPA right now.
The very next thought is probably about adding a cool fade-in, fade-out effect.
As you may have noticed, there are two additional sliders under the volume bar. One is titled Audio Fade In and the other is Audio Fade Out. These bad boys should be pretty self-explanatory.
Set up the duration and you’ll get one of the coolest professional audio editing effects in less than a minute. If you need more details, check up this blog.
Neat!
PS: If you still have any questions regarding how to mute the sound in a video or are generally looking for additional video editing advice, don’t be shy. Give us a shout out on either Facebook or Twitter and we’ll get back to you with an answer ASAP.
You might also like:
How to add a voice-over to your video


6 Comments
i have just used Animotica to create a memorial yideo for my wife which is a month away . my slideshow included all our favourite photos, and i added or i tried to add six of our favourite songs . on completion i found it was the last song that i added that played throughout the video six times !!. So the question i want to ask is, is it possible to add six different tracks , if so , What have i done wrong ?
Hello! To get a proper assistance write an email to support@animotica.com
Do we need a licence to use Animotica’s soundtrack for videos for youtube ?
Hello. No, you don’t.
I am adding various clips together from different sources. Is there a setting that automatically adjusts the volume of the clips so that the audio stays at a consistent level?
Hi! You can submit a feature idea here